Monday 31 January 2011

Tievebulliagh, The Hills and Glens of Antrim


I finally made it out today for the 1st time this year, I'd hoped that things would fall into place and I'd be able to visit the Cairngorms but it wasn't to be, in fact getting out today wasn't a certainty but as the walk had been planned by my mate Les I just needed to turn up. I had a few things to attend to this morning which required a trip into town so we decided to meet up at the layby near Essathoan waterfall at 12.00.

Our destination was Tievebulliagh, a nicely shaped (depending on where you view it from) little hill just to the NNW of Trostan. I'm not quite sure why we were going there, it was either because Les wanted to get some photpgraphs or because his mate Bert wanted to find the Neolithic axe factory, Tievebulliagh being a source of Porcellanite, but regardless I was happy to tag along.

Some sources claim that Tievebulliagh is one of only 2 places where Porcellanite is found and that axe heads from Tievebulliagh have been found in the Outer Hebrides and as far as the south of England, whether that's true or not I couldn't say but almost every source that refers to Porcellanite mentions Tievebulliagh.

When we met up at out start point the sky was overcast but it wasn't raining and was reasonably bright although there was a stiff breeze coming from the West/South West. As I'd been given the task of navigator I'd planned to take a fairy direct route over the Easten shoulder of Trostan before dropping down to a flatter section and then following the base of the broken outcrops to where the 'Axe Factory' was marked on the map. With that done my intention was to continue around the base of the broken rock before attaining the summit via a short steep grassy slope on the North side. With the summit reached we would then decend following the edge of the outcrop to pick up our outward route before returning via the summit of Trostan.

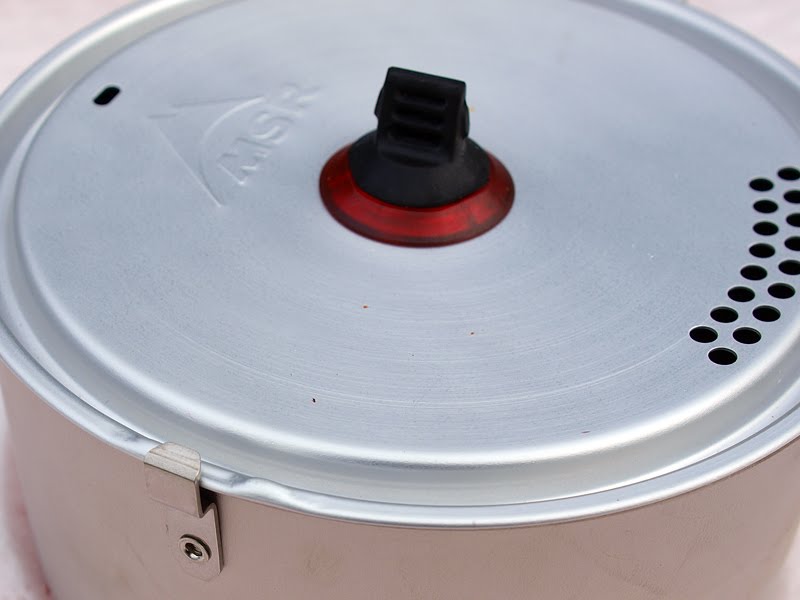
I'd aquired some new kit over the past few weeks, a consolation for the disapearance of the snow we had at Christmas, rather than a stove I took a new flask. I found it by accident in a cookware shop in town, made by EMSA with a 5 year guarantee it's hermetically sealed and is rated as being able to keep water hot for up to 12 hours. I'd tried it at home, filling it with boiling water after pre heating/priming it and the water was still at 58°c after 17 hours.

The other item I wanted to try out was a pair of 'Easy Windproof' trousers from Uniqlo. They'd been mentioned on the Bargain Alert thread on OM by 'Moonlight Shadow'. I really only bought them as I was ordering some Heattech thermal baselayer tops and longjohns as they looked like they'd be a good option for canoeing.

The rest of my clothing consisted of a L/S Heattech T-Shirt over a short sleeved version, on top I wore my Paramo VAL, a polar Buff rolled into a cap and SealSkinz Activity gloves took care of the extremities and I carried my Montane Flux as extra insulation to be used Paramo Torres style over my VAL during stops.


We set off at quite a pace but quickly settled back down to something that could be sustained for more than 5 minutes, at first benefitting from the forest track but before long leaving the forest to make the gradual climb up wet grassy and sometimes heather clad slopes to the shoulder from which we'd see our destination. Decending down off the shoulder the going was somewhat worse being heather covered almost all the way to the lower slopes of Tievebulliagh. We had to make an effort to maintain height and bearing as the wind which had increased by now together with the natural tendency to loose height when traversing causing us to drift off to the east. That was something that I wanted to avoid as I really hate loosing height after the effort of gaining it in the 1st place, especially when there's no good reason for doing so.


We reached the broad grassy ridge where it merged with the start of the broken rock/cliffs but rather than follow the base of the cliffs we decided to continue up the ridge following the edge. The view wasn't the best due to the low cloud and the wind was quite strong, certainly strong enough for Les and myself to stay back from the edge although we did move closer as we became more used to it. It was pleasant to be on soild ground and short grass rather than the boggy heather covered ground we'd crossed to reach this point and with the Summit in sight thoughts started to turn to lunch.


We stopped briefly on the summit while Les took a few photographs but the light was such that it wasn't worth messing around with tripod and filters. Looking down to the base of the hill we could easily see evidence of the axe factory looking like a clachan of giant molehills.


The broken rock/cliffs don't extend all the way along the ridge and from the summit it's just a short steep drop down to the axe factory, there's a choice of routes/techniques, straight down the grassy slope folloing the fall line, a zig/zag traverse down the slope or straight down a scree chute. Initially I opted for the zig/zag method but switched to the scree chute as it was easier.


Down among the mounds we stopped for lunch, the flask was produced together with Tunnocks Caramel wafers which went down a treat with a Starbucks Via. With lunch taken care of we set of again, this time skirting the base of the rocky outcrops. We all seemed to take different approaches. I chose to gain the required height right from the start and then maintain it until the base of the outcrop merged into the start of the long grassy ridge, in the end we all arrived at the shoulder at pretty much the same time.


By now the cloud base had dropped significantly and the wind if anything had picked up and swung around to a more southerly direction bringing with it light rain as we started to make out way across the featureless heather clad plateau. Visibility was still generally reasonable but from time to time it closed in, we were aiming to hit a fence line but in spite of trying to avoid drifting down to our left the endless zig/zag route through the peat banks meant we did drift off slightly. After crossing the fence the ground started to rise so with a fresh set of batteries fitted to the GPS (I'd forgotten to change them before starting out and hadn't been using it as we could see where we were going anyway) we checked our position and after a final steep pull we once again reached the shoulder of Trostan and soon picked up our footprints from earlier. We didn't waste much time as the rain which hadn't really increased in intensity had become persistant, the visibility had become worse and the wind was showing no signs of abating.


Dropping down off the shoulder the edge of the forest soon became visible on our right and we simply followed the fence line down to a break in the forest with only a short distance along a firebreak to reach the forest road at Essathoan waterfall. Within 20 minutes we were back at the cars and once gear had been packed and wet jackets replaced with dry ones we were on our way.

The Gear

I hadn't gone out with the sole intention of testing gear, I expected everything to work fine although to be honest I hadn't expected it to rain and if I had I may have chosen not to wear the Uniqlo Easy Windproof trousers and would have worn my ME Ibex softshell instead. As it turned out the Uniqlo trousers were absolutely fine, they looked dry apart from the bottom of the legs (I hadn't worn gaiters) although even then they didn't feel wet inside. I'll look at the Easy Windproof trousers in more detail in due course.

The Paramo VAL performed faultlessly, I hadn't needed to vent it and was comfortable wearing the Heattech baselayer, the hood on the VAL did an excellent job of shielding my face from the wind driven rain.


The flask worked as expected and finally the Sealskinz Activity gloves kept my hands dry and mostly warm, I knoew they weren't totally waterproof as I'd already given them the 'Bucket Test' and they did leak a little at both thumbs but they provided enough grip and dexterity for me to operate a DSLR and generally enough insulation to keep my hands warm.

All in all it was a good day out even if the weather did limit the views towards the end.

Sunday 30 January 2011

Alpkit Rig 7 Tarp, Pitching with Paddles


Classic Lean-to

Although I still haven't managed to actually try the Alpkit tarp I was messing around trying to pitch it in different ways and as I'd like to use it on canoe trips I thought I'd see how it went using paddles rather than trekking poles. The only real difference is that you can't adjust the length of a paddle which would have restricted the pitching options but I managed to come up with a way around that problem. I've no doubt that my method is nothing new and there may well be better ways of doing it but this works for me.

The problem with tying the guylines around the shaft of the paddle is that they have a tendency to slip down the shaft so I managed to wrap the guyline around the shaft, bring it up over the handle and back down to the peg. While that worked ok the guylines really needed to be longer so I simply made two guyline extenders from paracord.


Guyline Looped around paddle to prevent slipping

In addition to the 2 main guylines I had initially only made 4 guylines for the lifter loops but added another 2. I think the more cords/guylines you have the better as it gives you more pitching options and the tighter you can get the tarp the better it is.


Same Basic pitch as above, I simply lowered the tarp at one end by sliding the rear guyline down the paddle


Obviously it's just as easy to pitch like a tapering ridge tent, wrapping the guyline around the shaft just above the blade at the low/foot end keeps the guyline from slipping down. One other thing I found was that in ridgetent formation if the paddle is angled to the side it helps to use a tent peg to stop the paddle from slipping sideways.


Basic Sloping Ridge


Paddle Pegged to prevent Sideways slip


3 Line Overkill, It Does need 2 Guylines though


Finally I tried it with both paddles tied together in A frame shape which is obviously very stable, again a peg keeps the paddle from slipping sideways. I used 2 guylines to pull the edges of the 'porch' closer to the paddles and in the pics below I've simply tied them off to the main guylines, while it worked ok I found that 2 prussik loops fitted Alpkit mini clipper carabiners worked better and allowed more adjustment, the prussik loop attached to the guyline and the mini clipper attached to the tie out loop on the tarp. Set up as below it's too short to use without a bivvy bag but it's very stable and provides plenty of space for cooking and so on.


Tarp Tensioned by tying off 2 secondary guylines to the main guylines. I've made prussik loops which to do the job much better.


I'm quite sure none of this is ground breaking stuff and there may well be better ways of achieving the same result but it's kept me amused trying different things. If I was using it in a forest or could find a few sticks I could increase the internal space by using the lifters as intended, without something to raise the guylines they really only serve to create some tension however if they're tightened too much they tend to flatten the tarp reducing internal space so.

To me a tarp is a bit like lego, there are few rules and seemingly no limit on the amount of configurations you can come up with given time.

Saturday 29 January 2011

Cooking Sets, Coleman and MSR

Most of my cooking pots are mug type as I really only ever boil water, the most often used would be the Alpkit Mytimug at 750ml or an identical but shorter 550ml pot from Tibetan Titanium. I also have a Heinie pot and a Tibetan Titanium 900ml pot but sold off some cookests last year including a wider Snowpeak Compact cookset. It was only when we had snow before and during Christmas that I unearthed my MSR Whisperlite International petrol stove but I discovered that none of my cooking pots suited it very well being too tall and narrow for stability, too small to carry the Whisperlite and not the most efficient shape for melting snow.

As I wanted something to use specifically with the Whisperlite I started to look at what was available. I looked at quite a few sets from a variety of differenr companies including Blacks, Vango, Hi Gear etc, the Hi Gear Trail 4 looked like a versatile option) and also looked at the more expensive brands including Primus, Optimus MSR and Evernew. What I found was that the majority of those that were of sufficient diameter came as part of a 2-3 person set and most came with a frypan lid which I didn't really want. I ruled out the Evernew pots as they seemed similar to the Snowpeak set I had and I always found the Snowpeak to be too slippery, I alos ruled out pots that had 2 part fold out handles. In the end I decided on the MSR Quick 1 pot, identical to the Quick 1 System but without the mug. The MSR pot looked like it would hold the Whisperlite and had a basic lid but with a handle similar to the one on the MSR Reactor pot.


The MSR Quick 1 pot is nicely made, it's quite light (186g) being titanium and the lid fitted well but while the handle felt secure I didn't like the way it stuck out from the pot even when folded. The pot capacity is 1300ml and has volume markings stamped down the side and the lid while being similar in style to the Reactor pot is metal rather than Lexan. The Whisperlite fitted but only just and while I resigned myself to using it I wasn't entirely happy with it.


Shortly after I'd got it I found the Coleman Exponent 1 cookset while browsing ebay. It came as a 2 pot set, the smaller pot being similar in size to the MSR Quick 1 with the larger pot being just a litte bit wider. The set only came with one lid which was flat rather than a frying pan type and the pot lifter was a Trangia style one. The set was listed at £20 so I ordered one.


The Coleman pots are aluminium with a hard anodised finish and a non-stick coating and both pots have stamped volume markings, the smaller pot having a marked maximum of 1200ml and the larger a marked maximum of 1500ml. In addition both pots have deep grooves on the base to stop them from slipping around on the stove. The lid sits securely on both pots and has a silicone pad around the lifter/knob on the lid to help keep it cool, the lifter being metal. The lifter folds flat but is made in such a way that it stays in the raised position when folded up. The pot grab/handle is similar to the ones supplied with Trangia stoves but is plastic coated where it grabs the pot to stop it scratching the non stick coating, one clever touch is that the lifter comes with a cloth pouch for storage but it also doubles as a cleaning cloth. The cookset also comes with a mesh stuff sack. The downside of course is that it's quite heavy, more than suggested by quite a bit. The listed weight is 425g the actual weight being 571g which is a really poor showing by Coleman, that said considering I'm intending using it with a petrol stove which isn't all that light once the fuel bottle is added I'm not overly concerned about the weight, as I won't be using the smaller pot it'll effectively weigh 395g, the weight of the individual parts is as follows.

1.5ml Pot - 200g
1.2ml Pot - 173g
Lid - 100g
Pot Grab/Lifter - 59g
Pouch for above - 14g
Stuff Sack - 22g


The downside now is trying to decide which one to use, although the weight isn't a primary concern the MSR pot is half the weight while the Colman set up is otherwise more suitable.


Wednesday 12 January 2011

Alpkit Rig 7 Tarp, Limited only by Imagination?


I've been pretty fed up the past 2 weeks as the snow has gone and been replaced by the usual dreich weather that we get here. I was having a look on some websites and when browsing the Alpkit site I noticed that the Rig 7 Tarp was back in stock. I'd looked at them before as they seemed a reasonably priced way of trying a tarp, my only previous experience being with a German army poncho. I went ahead and ordered it and as is normal with Alpkit it arrived very quickly.


The Rig 7 is the smaller of the 2 tarps that Alpkit sell and is a basic flat sheet tarp measuring 2800mm x 2400mm and weighing in at 520g. It has webbing loops on all 4corners with 3 reinforced pegging points along each edge, in addition there are 8 reinforced lifter loops, 4 along the ridge line and 2 lower down on each side.


The tarp is made from 2 pieces of siliconised nylon so there's a seam which runs across the tarp but this appears to be seam taped. The tarp came with a stuff sack but I'll replace it with something a bit bigger as it's a bit of a tight fit when guylines never mind pegs are added.


Basic A Frame

I had a 4 2mm dyneema guylines already made up and 2 4mm guylines made from the cord I'd bought in Decathlon a while back so with those, a assortment of pegs and my trekking poles I set it up. The 1st set-up was just a basic A frame which provides plenty of length but acts like a wind tunnel, I then tried what I think is called a cave which provided more shelter but less space, finally I tried a kind of long low ridge tent shape and added some lifters to create a bit of foot space.


Cave?


As Above


Low & Wide


As Above


As Above Inside

I didn't try anything else at that stage but after work during the week I added 4mm cord loops to all the attachment points to allow me to add the guylines to any point I wanted. I made the guylines with a loop on the end which I simply attach to the fixed loops as shown below.


4mm Main Guyline Attached to Fixed Loop


2mm Dyneema Guyline Attached to 4mm Fixed Loop

I wasn't working today and it wasn't raining so I took it out again to see what other configurations I could come up with. I tried a Flying V variation, at least I think that's what it was and another ridge tent shape with and without a beak. I'm sure there are a multitude of other variations so I'll have to search the Internet but for now it seems quite versatile.


Kind of Flying V I think!!


As Above


Ridge Style, Without Beak


As Above


Ridge Style with Beak, Additional Fabric held back by tying lifter loops together, they can be pegged towards the main guyline.

I'll keep playing with it but it's unlikely I'll use it just yet as I have a week off starting next Wednesday and there's a slight chance that I'll be able to get over to Scotland for a few days, probably around the Cairngorms. If that trip happens then I'll be busy once I return as I have a lot stuff to sort out just now. I'm looking forward to trying it though as I didn't have any problems as such with the army poncho.